The Bowes Museum Blog
All aboard! Training on the job with the Conservation Advisory Network
13 Sep 2016
Here at The Bowes Museum, the work of the conservation department isn’t limited to the studio or even the Museum itself, but extends over the North East region through the Conservation Advisory Network (CAN). Regular readers of our posts will know that CAN is a free collections care advice service delivered by The Bowes Museum and Tyne and Wear Archives and Museum‘s Museum Development Programme. The service helps museums in the North East with conservation and collections care advice and training.
Last month, I accompanied objects conservator Karen Barker on a CAN project to remove graffiti from the inside of a train carriage. While this may not sound like a conservation problem, the carriage in question was an example of a third class North Eastern Railway (NER) carriage circa 1865, on display at the Head of Steam Railway Museum in Darlington.
The Head of Steam is a former train station that houses a collection of objects and archive material illustrating the development and operation of railways in North East England.

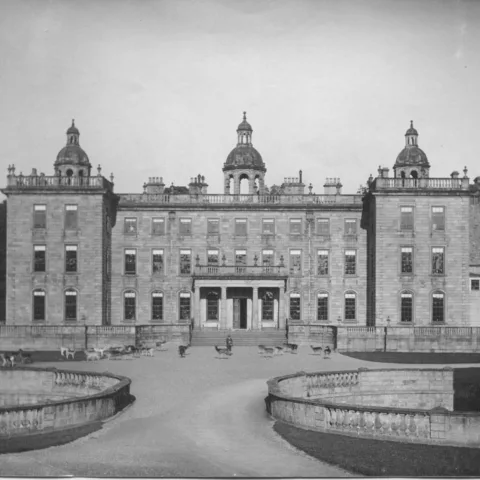
Outside the Head of Steam Museum

Exterior of carriage
As the Painting Conservation Intern at The Bowes Museum I’m generally accustomed to working on traditional easel paintings on canvas, so I was intrigued by the project and keen to further my interest and experience working on modern paint films. I’d already had some prior experience working on a project involving graffiti – but that was for its preservation not removal!
Of course graffiti can be a form of artistic and political expression but these scribbled (and sometimes abusive!) tags were no Banksy. Our aim on this project then, was to preserve the integrity of the historic object (which was on loan to the museum from National Railway Museum in York) by removing the graffiti.
What interested me in this project was that unlike a fine art painting in the Museum that would be cleaned to improve its appearance before going on display, the carriage was a piece of social history complete with its own authentic layers of soot, dirt and fingerprints, built up over time, which reveal its history of use. Our challenge as I saw it was not only to remove the graffiti, but to retain that authentic ‘patina’.


Interior of the sparse third class carriage with black marker pen graffiti most visible. Also noticeable is the ‘authentic patina’ of fingerprints and sooty dirt layer from exposure to particulate dirt from the steam engine and the internal oil lamp that was lit at night.
We identified nine areas of graffiti above the doorways on the left side of the carriage that were predominantly in black marker pen with some graphite and ball point pen. The wooden substrate interior had clearly been repainted numerous times in a cream domestic gloss or emulsion paint, leaving an uneven surface which was yellowed and discoloured.

An example of the marker pen graffiti

An example of the ball point pen and pencil graffiti also revealing the uneven and yellowed substrate.
After assessing and documenting the condition of the interior and the graffiti, Karen and I then set about testing a range of solvents on the different graffiti media, increasing in polarity from deionised water to acetone using a cotton swab. The cleaning tests were carried out to ascertain effective cleaning systems that could solubilise and remove each of the different media without affecting the ‘original’ gloss paint beneath.
The tests revealed a number of results:
- The gloss paint covering the wooden substrate was very degraded and therefore particularly vulnerable to any abrasive action from the cotton swab stick.
- However a certain amount of abrasion or solubilisation of the gloss paint layer was necessary to effectively lift the majority of the graffiti media, in particular the black marker pen ink.
- It was also evident that the black ink had migrated through the gloss paint to the wooden substrate, which meant that certain amount of ink was retained in the paint surface and appeared faded and grey after treatment.

Carrying out cleaning tests on marker pen ink
The tests revealed that a ratio of 50:50 propan-2-ol and deionised water was the most effective cleaning mixture for removing the black ink and biro graffiti; increasing the water content to reduce the strength of the mixture where necessary. Once the majority of ink was lifted, Pre-lim (a mild cream abrasive used in metal conservation) was generally applied to evenly reduce the appearance of the residual grey stains.

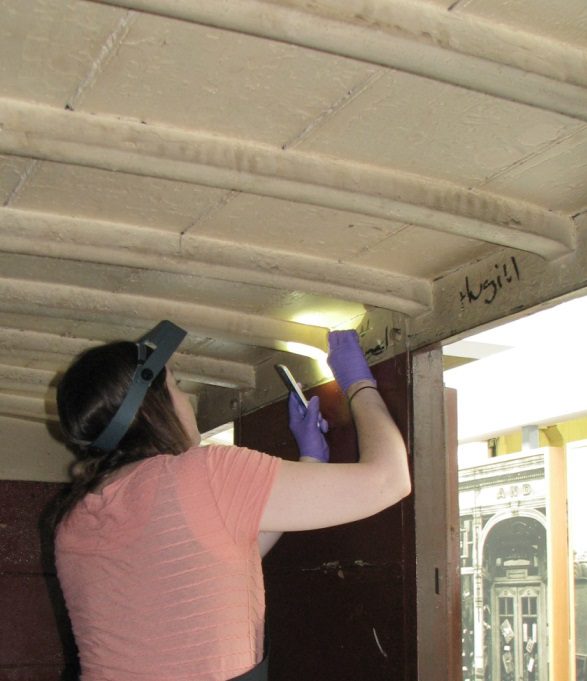
During treatment inside the dimly lit carriage, where the torch on my phone came in handy –sometimes, working on site with limited equipment, you have to improvise!
The most effective method of removing the pencil was deionised water with a drop of detergent to cut through the greasy layer – applied with cotton swabs and cleared with deionised water.
While we tried as much as possible to localise the treatment, we noticed that all the cleaning methods tested also lifted the general dirt layer (aka the ‘authentic patina’) surrounding the graffiti, which created an obvious ‘clean’ area, emphasising where treatment had taken place.
This addressed my initial thought of how we could remove the graffiti without removing the layers of ‘original’ dirt. It was going to be difficult!
For that reason we chose to retouch over the cleaned areas with our own ‘dirt’ layer that would blend in with the surrounding dirt and disguise the stubborn grey residues of the black marker ink.
Acrylic paint was chosen as the retouching media for its opacity, similarity to the gloss/sheen of the original paint layer and its reversibility with xylene (cleaning tests had revealed xylene did not affect the gloss paint layer).

An area of black marker pen before treatment

The same area after cleaning now with obvious clean areas where the dirt layer has been removed and also showing the permanent grey residues from the marker pen ink.

The same area after retouching over the treated area with an acrylic ‘dirt’ layer.
A first layer was applied using a limited palette of yellow ochre, titanium white, carbon black, raw umber and burnt sienna with added cadmium yellow to counteract the purple/grey stain of the marker pen beneath. Then a ‘dirt’ layer was applied on top, to match that covering the surrounding substrate, by stippling on the same palette with more black and burnt umber.


Marker pen before treatment (top) and after cleaning and retouching (bottom)


Interior shots of the carriage after treatment
This was another excellent training opportunity offered through CAN, allowing me to build on my experience working on site and treating modern paint films.
It also offered me a chance to visit a hidden gem in Darlington. While I can’t profess to be train enthusiast myself, the locomotives and rolling stock displayed in situ which document the social and industrial history of the region, manage to evoke a sense of a bygone era that is well worth a visit!
Related posts
All posts
Creating a Space to Explore Collections Care
Over the last two years there has been a spurt of object movement at Museum, spurred on by the implementation of its new Mission and Values and focusing on making the collections more accessible. Some objects in storage are being relocated and some storerooms are being re-purposed. The result is that many objects which haven’t

Displaying Textiles: Mounting historic dress from the Tullie House Museum & Art Gallery Collection
The Bowes Museum’s ICON (The Institute Of Conservation) textile conservation interns were working on bespoke mounts and supports for items of historic clothing from the Tullie House Museum & Art Gallery, in Carlisle until March. In total, 26 objects from the Tullie House textile collection have been worked on in the Bowes Conservation studio. The
George the Handsome
George Bowes was a very fortunate young man. He was born on the 21st of August 1701, the son of William Bowes of Streatlam Castle in the south of County Durham. His mother was Elizabeth Blakiston, the daughter and heiress of Francis Blakiston of Gibside in the north of the county. Sir William Bowes pre-deceased his


VW: Rebel Storyteller Visionary Wooden Pin
£4.50
Rebel Storyteller Visionary Cotton Theale Bag
£19.50
Rebel Visionary Storyteller Magnet
£3.50

Rebel Storyteller Visionary A2 Poster
£3.99

Bowes Museum x HIMP Westwood Tote Bag Black
£16.99
SIGN UP TO OUR NEWSLETTER