The Bowes Museum Blog
Paintings Conservation: Fruit and Vegetables with Figures in the Background
18 Sep 2012
I am a painting conservation student currently studying at Northumbria University. This summer I was give the wonderful opportunity to undertake a two week work placement at The Bowes Museum where I have just begun conserving the painting Fruit and Vegetables with figures in the Background with help from Jon Old, The Bowes Museum’s Conservator.

Fruit and Vegetables with Figures in the Background depicts three agricultural workers surrounded by and washing an array of fruit and vegetables. It is a Flemish painting from the Seventeenth Century. The style and subject matter of the still life with figures was typical of Flemish painting for this time. The subject matter had also been linked with the popularity of Latin text and sources in Sixteenth Century Netherlands.
Although the artist is unknown the influence of a fellow Flemish painter Pieter Aertsen can be seen in the composition of the work which replicates Aertsen’s Preparing for the Market from the sixteenth century.
My first task was to carry out a condition report on the painting to assess the type of treatment which needed to be carried out. The painting was examined in normal light where an old, yellowed discoloured varnish could be seen. Cleaning tests were carried out in the blue sky area and on the white of the man’s apron which revealed the vivid original paint colour underneath. Across the sky area lighter patches of blue showed where a previous conservator had painted over areas of missing paint.
Other types of light used were raking light and ultraviolet light. The latter highlighted a varnish, some dark patches of dirt, dark areas where the paint is missing and areas of paint loss which had been restored with over painting.
The painting is due to go on display in the exhibition Feast Your Eyes: The Fashion of Food in Art at The Bowes Museum which starts on 6 October and will later travel onto a National Trust property, Washington Old Hall.
What a treat to conserve the painting. I hope you also enjoy the process!
Stage 1
Stage 2 – Cleaning
Day four and the painting is beginning to change dramatically…and what a change! After dusting and cleaning the whole surface with a slightly alkaline chemical solution a filthy brown layer of dirt was taken away. The painting was then ready for varnish removal.
Using a selection of organic solvents a small test was carried out on each of the paint colours to make sure they would not cause any harm. After choosing the most effective and safest solvent a larger area of varnish and old areas of repainting were removed to reveal an array of vivid new colours. It provides just a peek at what is to come, take a look for yourself.
Stage 3 – The Magnificent Cabbage
Towards the end of cleaning most of the varnish has been removed and now its time for the cabbage…and what a cabbage. Its inclusion is said to have a symbolic meaning and was possibly influenced by ancient Greek texts popular in seventeenth century Netherlands. Two different organic solvents were used to clean, one to remove the varnish and one to remove some yellowed staining which revealed beautiful highlights underneath.
Stage 4 – Varnish Testing
Into the second week and after removing all the old varnish and over-paint the work is ready for a fresh coat of varnish. I’m applying the varnish before doing any other restoration work to preserve and protect the original paint layers from any new paint I’m going to retouch with later. The varnish layer also helps wet out the colours to make retouching easier and aids the reversibility of any new paint added.
Stage 5 – Paint Retouching
It is a terrific challenge to retouch the missing paint, caused by old damages – the painting is 400 years old and we expect it to show signs of wear and tear. For ethical reasons and to preserve the integrity of the picture only the areas of damage are going to be painted over. The white areas are filler, applied to areas of missing paint by a previous restorer. The filler on the whole looks to be in good condition so we left it in place. To help get the most accurate colour match the fills first need to be painted a brown colour to match the original under paint layer (called the ground). This ground layer affects the colours painted on top.
We mix up our own paint as it dries quickly and can be easily removed – unlike oil paint which will dry as hard as the original. Its a very satisfactory job seeing the white areas disappear and the painting start to come together again.
Emma Garvey, Conservation Student, Northumbria University
Related posts
All posts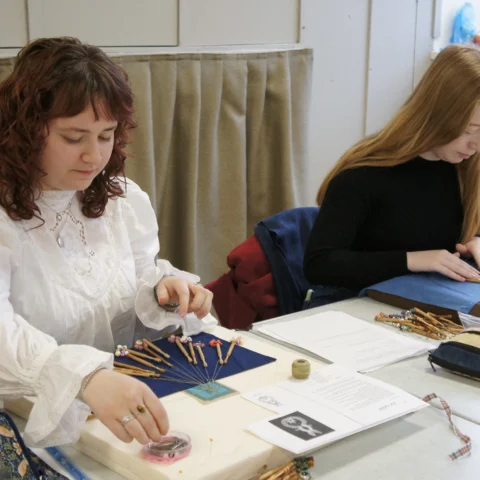
Volunteering with The Blackborne Lace Collection
When I saw the advertisement for a PhD studentship exploring The Blackborne Lace Collection at The Bowes Museum, I was desperate to be involved. At the time, I was finishing my undergraduate course in Conservation of Cultural Heritage, and looking for opportunities to further my experience before doing a master’s degree in Textile Conservation. After
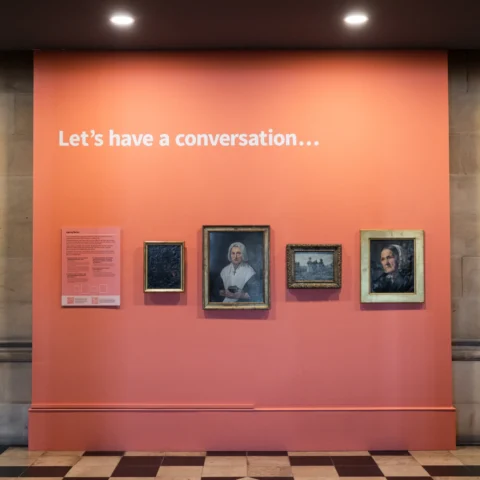
Ageing Better
November’s Conversation Wall, titled ‘Ageing Better’ presents a selection of 18th and 19th century paintings depicting different interpretations of ageing. The display puts the paintings into context, explaining the social and historical factors including class, gender and material status that would have impacted someone’s quality of life in the time that the subjects were painted.
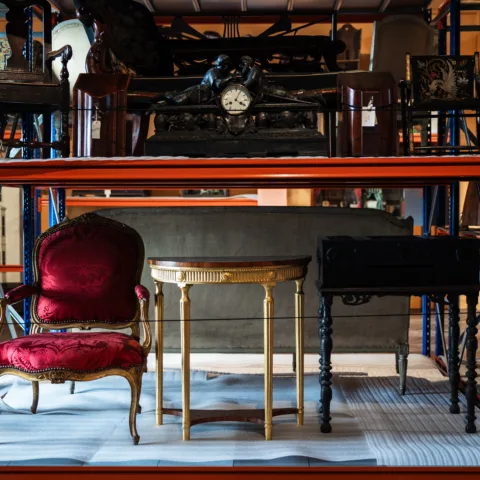
Creating a Space to Explore Collections Care
Over the last two years there has been a spurt of object movement at Museum, spurred on by the implementation of its new Mission and Values and focusing on making the collections more accessible. Some objects in storage are being relocated and some storerooms are being re-purposed. The result is that many objects which haven’t


VW: Rebel Storyteller Visionary Wooden Pin
£4.50
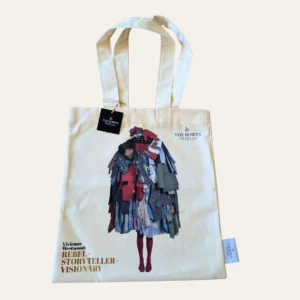
Rebel Storyteller Visionary Cotton Theale Bag
£19.50
Rebel Visionary Storyteller Magnet
£3.50

Rebel Storyteller Visionary A2 Poster
£3.99

Bowes Museum x HIMP Westwood Tote Bag Black
£16.99
SIGN UP TO OUR NEWSLETTER