The Bowes Museum Blog
Doll Conservation: Wash Day
20 Mar 2016
After documenting and assessing the doll and her costume, the first step was to wet clean (wash) all the linen undergarments. The shift, petticoat and pocket were all soiled with cellulose degradation products, which are the result of the natural deterioration of the fibres. Other stains are the result of unclean hands, or direct contact with metal fastenings, and for the outer textiles, a sprinkling of dust and airborne pollution. The benefit of washing a soiled textile is more than simply improving its appearance. Cellulose degradation products are by their nature, acidic; and stains can cause textiles to deteriorate to the point of perishing – leaving holes. In some instances, soiling can attract pests, and the longer a stain is left on a textile, the harder it may be to remove.

In a state of undress – soiled linen shift
The doll’s whitework apron was also very soiled, so was removed from the dress for washing. The stitching was unpicked at the waist, the thread was bright white, and highly spun, indicating that the apron was attached (or re-attached) during the 20th century.

Apron, shown on a light box to highlight the damage
All were washed in separate shallow trays, by hand, using a conservation grade detergent, in this case Hostapon T, an anionic surfactant. A simple calculation involving the volume of the wash bath, and the known optimum concentration of detergent (in grams per litre) was used to make up the detergent wash solution. It is important that an accurate amount of detergent is used, too much, and the surplus has no beneficial effect, but will lengthen the amount of time (and therefore handling) required for rinsing. Too little detergent, and it will not have the optimum effect, leaving soiling within the fibres.
The same principle applies to laundering your clothes at home, the detergent manufacturers have done these caluclations for you, and give guidance on the packet as to how much detergent to use for optimum results. Every time textiles are washed, some fibre loss occurs, so we aim to wash historic textiles as infrequently as necessary, but as efficiently as possible.

Pocket and shift in small trays before washing
The first stage is wetting out. Allowing the textile to relax in the water, and the fibres to begin to swell. Slightly warm de-ionised water was gently introduced to the tray (we have it on tap in the conservation studio), and the textiles were left for 15 minutes.

‘Wetting out’ the petticoat and apron in a small quantity of water
After draining the first bath (retaining a small sample for later), the tray is filled with the wash solution (detergent and water mix). Synthethic sponges are used to agitate the detergent, pushing it through the textile to aid the process. This creates a lather, and dislodges soiling.

During washing – textiles obscured by detergent lather
The first wash bath lasted around 45 minutes, occasionally turning the textiles over, carefully, as they are more vulnerable when wet. With the water drained (and another small sample taken), the textiles were briefly rinsed in de-ionised water. The trays were re-filled with a second wash solution, this time with a reduced amount of detergent, taking into account that much will still be trapped within the textile. More gentle sponging continued, for another 45 minutes or so.

Second wash bath (with samples of water in background).
Through keeping a sample of the water from the initial rinse, a sample from the end of the first wash bath, and a sample from the end of the second, the pH, and colour, of the 3 samples can be compared. It is not uncommon to see the pH of the initial soak drop, as acidic cellulose degradation products are immediately released into the water. Wash bath solutions often appear dirty, either yellow or brown, as they contain the soiling removed from the textile. This is always re-assuring the see – proof that the textile is getting cleaner! If after the second wash bath, the water is still very dirty, a third wash bath may be necessary.

Water samples from washing the linen shift. Initial soak (left); first wash bath (middle); second wash bath (right). Noticeably yellow water in the first and second samples.
The textile then requires rinsing, and as a general rule of thumb, it takes up to twice as long to rinse as it does to wash. So a textile that is washed for 2 hours, could reasonably take 4 hours to rinse – that is, remove all traces of detergent from the textile. The doll’s clothes were relatively quick to wash, being small, and lightly soiled. Rinsing was done with de-ionised water, either in static baths, or as a gentle running rinse over the surface of the textile.

Linen shift still wet after washing
With the last of the rinse water drained from the tray, soft muslin cloths were used to soak up any remaining water, and laid under and over the textiles, gently pressing to soak up moisture. With excess water removed, the textiles were laid out on dry muslin, and allowed to air dry, with the aid of a cool fan, blowing gently over the surface. At the point of drying, creases can form in the textile, so the clothes were padded according to their shape. The linen shift had soft net inserted into the sleeves; the apron had a soft pad of net inserted beneath it, to account for the gathers in the fabric at the waistband; and the petticoat was fully padded with soft net to dry. By preventing creases when drying, this avoids later work to remove them.

Apron and petticoat drying, supported with soft net
A record sheet is commonly used to document the length of time the textile is washed for, if the water is agitated, or left to soak, and if any washing additives are used. Type and concentration of detergent is also recorded. Each object was wet cleaned for around 4.5 hours, from the initial soak to wet the textile, to removing it from the water, and beginning the drying process. The drying process then took several hours. As the objects are small, two were washed at a time, in trays alongside each other. With drying, and then the inevitable tidying up of the studio afterwards, it took two full days to clean the 4 white items of doll’s dress.

Petticoat, pocket, and shift – after wet cleaning
On any tour of the textiles conservation studio, visitors inevitably spot our washing machine, and ask if we wash the historic textiles within it. Historic textiles can look deceptively robust. This doll, and her clothes and undergarments, dates to the 1740s. The rough handling of the washing machine, use of hard water from the mains supply, and introduction of an uncontrolled amount of detergent, along with the fact you wouldn’t be able to monitor the textile within the machine all add up to a terrible idea. Hand washing historic textiles is a very controlled process, with the textile given undivided attention, use of appropriate and conservation-grade detergents and additives, to achieve a result with the long-term preservation of the textile at the forefront of our minds.
In my next post, I’ll show thenext stage of conserving the white underwear, and apron.
Katy Smith, Textiles Conservator
Related posts
All posts
Creating a Space to Explore Collections Care
Over the last two years there has been a spurt of object movement at Museum, spurred on by the implementation of its new Mission and Values and focusing on making the collections more accessible. Some objects in storage are being relocated and some storerooms are being re-purposed. The result is that many objects which haven’t

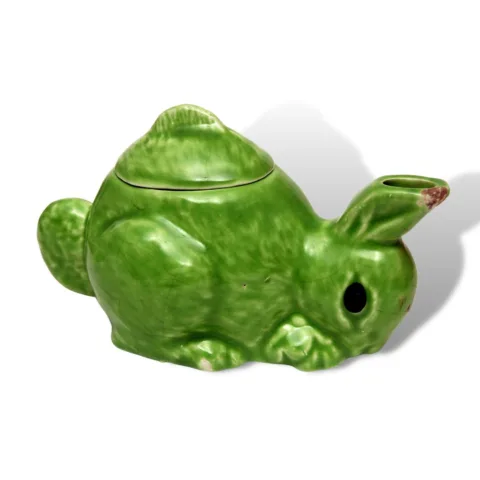
The Year of the Rabbit
The New Chinese Year starts today represented by the year of the Rabbit. The Rabbit is considered the luckiest of the 12 animals that comprise the Chinese Zodiac. Many moons ago in ancient China. The Jade Emperor decided to hold a Great Race between the 12 most iconic animals within his kingdom. The animals


SIGN UP TO OUR NEWSLETTER