The Bowes Museum Blog
Operation Altarpiece: Project Overview
22 Jun 2015

The Altarpiece before treatment
Work on the crowd funded project Art Happens to conserve and redisplay the 15th century Flemish altarpiece has now come to completion, and I am both delighted and slightly saddened (our studio seems a little empty now) to bring you my latest post which will endeavour to give you an overview of each of the different treatments stages pertaining to the conservation of the 6 double sided, 15th Century, Flemish, panel paintings by the Master of the View of St. Gudule. For want of going over old ground, this post will bypass the initial phases concerning technical examination and the treatment of flaking paint, as they have been covered in previous posts.
Un-framing:
After flaking the next treatment stage involved the careful un-framing of each of the panel paintings. These frames although not original to the altarpiece (C.1960), have an interesting history, as we believe they were created by cannibalising sections from disused exhibition cases, that were originally purchased from the Paris Salon in the 1860’s.
The outer oak veneer was carefully removed by hand and the metal L brackets in each corner were unscrewed. The metal nails spanning across the corner joints were then extracted using a bradawl and bull-nose pincers, and the wooden pegs present in each corner joint were carefully drilled out. Silicon release topped Plastazote was then placed underneath the underside of the panel, and the now unsecured sides of the frame were slowly eased apart using a small chisel.

(left): Removing the oak veneer (right): Frame joint during dismantling
Re-joining panels:
Two of the panels Christ before Pilate/St. Gregory and The Risen Christ/St. Augustine were shown to have suffered complete separation in the joins between the first and second boards. However for once an upside could be gleamed from a religious divide, as these breaks allowed us to gain further insight into the construction and structure of the panels. This ranged from gaining accurate measurements of the cross section of each board, which showed the sizeable and symmetrical tapering towards each end, to their apparent systematic deployment of three equally spaced wooden dowels per join line.

(left): Panel break in Christ before Pilate/Saint Gregory (right): Panel break section showing tapering
In order to rejoin these breaks we firstly needed to use a fine scalpel aided by Optivisors (x 2 magnification) to carefully clear any traces of the original adhesive, likely to be a form of hide glue, from each side of the join and from the surface of the dowels. Once this stage was completed the potential refitting of the separated boards was examined, and an appropriate clamping and weighting procedure was devised, which would safely take into account any inherent or potential warping.

(left): Old adhesive residue on the edge of a separated panel board (right): Scalpel removing old adhesive residue
The next step was to locally apply a thin layer of Cosomoliod wax along the edge of the painting adjacent to the joining edge of each of the separated boards. This procedure creates a kind of protective barrier which both separates the paint layer from potential contact with excess adhesive used during rejoining, and provides a non-stick type surface which readily aids the safe removal of any of the said adhesive, even once dry/set.

Application of Cosmolloid wax
High Tack Fish Glue, which is a cold set collagen based adhesive, was selected to be used for the task of rejoining the panels. Due to the minor gap noted towards the centre of one of the joins during examination, it was decided that when required fine oak sawdust would be added as filling agent. Once mixed, the adhesive was brush applied across the joining edges and over the dowels. The two sides of the join were then brought together, carefully clamped and weighted, and left for 24 hours. Any excess adhesive was immediately cleared along the join line and this process was repeated on the reverse, once the joint was set. It is important to note that this procedure was conducted on a clear flat work surface which was covered in a non-stick layer of silicon release paper (imagine baking paper after finishing school).

Adding oak sawdust to High Tack Fish Glue

(left): High Tack Fish Glue application (right): Clamped panel during re-joining
Surface Cleaning
The moderate layer of surface dirt present on the surface of the panel paintings was then carefully removed using a dilute Ammonium Hydroxide in deionised water solution applied via cotton wool headed swab-sticks. The level of surface dirt was shown to vary, with the sides depicting the saints displaying noticeably higher levels. Whilst not an indictment on their personal hygiene, this fact backs initial examination findings, regarding the Saints having undergone less surface cleaning treatment in the past, which is possibly due to these sides not previously having been on public display.

(left): Surface cleaning St. Jerome (right): Saint Jerome during surface cleaning, (top half untreated, bottom half treated)

Selection of used cleaning swabs from The Adoration of the Magi
As a side note to surface cleaning, several panels also displayed small, scattered droplets of a resin type accretion (most likely attributable to drips from past brush varnish applications), which were carefully removed at this stage using a fine scalpel and Optivisors (x 2 magnification).

(left): Resin droplet before treatment (right): Resin droplet after mechanical removal
Removing old fills
A small number of minor instances of poor quality, prominent and visually marring old fillings could be seen on several of the panels. A filling as the name implies is a treatment that is used to physically fill an area of loss in the paint layer (may also include the ground layer), and should seek to accurately replicate the topography and texture of the surrounding paint surface. The level of each fill should also take into account the thicknesses of the subsequent paint layers applied during retouching, in order not to appear higher than the original paint layer.

(left): Photo of old filling (right): Image after the removal of the old filling
These old fills were carefully removed using a fine scalpel with the aid of Optivisors (x2 magnification), and the area was cleared of any remaining debris with a deionised water dampened cotton wool headed swab-stick.
Partial varnish removal:
The outer varnish layer present on each of the panels was shown to be suffering from moderate discolouration and yellowing. Therefore a series of cleaning tests was undertaken, which identified Propan-2-ol as a safe and effective solvent for removing the outer varnish layer, and the solvent was cautiously applied to the panels using cotton wall headed swab-sticks.
Targeted areas of significantly discoloured old retouching (non-original paint over areas of loss) and small areas of overpaint (non-original paint over original material) were also carefully removed at this stage using Acetone. However time restrictions limited the depth of our excavation through the sediment of previous treatments, and we were compelled to leave the lower varnish layer and wider areas of retouching in place.
Filling:
Areas of loss in the paint layer and the very minor step noted in regions of the join line of one the newly secured panels, were then filled using Flugger (fine acrylic putty stabilized in water). This material was applied using either a small pallet knife or a fine filling tool, with any excess being immediately cleared from the adjacent paint surface via saliva dampened cotton wool headed swab-sticks. Once dry, the fills covering the areas of loss were then each shaped and incised using a fine scalpel (aided by Optivisors), in order to closely mimic the form and texture of the surrounding paint layer.

(left): Incising and shaping a filling on Saint Antony (right): Image of a fill during final shaping
Isolating varnish
The next stage was to brush apply an isolating varnish layer (Laropal K80 2:1 Stoddard Solvent) to each side of the panel paintings. This layer performs a number of functions, it firstly as the name implies isolates the underlying painting from subsequent treatments (retouching), as well as also aiding retouching by providing surface saturation.

(left): Using velvet to remove any debris (dust, hairs etc) from the surface of the panels (right): The brush application of the isolating varnish layer
Retouching:
The next stage was to visually reintegrate the previously filled areas and the regions cleared of old discoloured retouching. This procedure is called retouching or inpainting, and in basic terms describes the application of paint solely to areas of loss/damage in the original paint layer.
We elected to use an MS2A (Ketone resin) binding medium in conjunction with dry pigments and a white spirit diluent. Each area of retouching sought to strictly follow the artist original intent (form, style etc) and was carefully colour matched to the surrounding original paint film. The structure of each retouching varied depending on the targeted area, and could range from single to multiple layers, as well as also incorporating glazes. Each colour was individually mixed on the palette using a range of combinations of dry pigments, and applied to the targeted area using a fine Kolinsky sable brush, aided by Optivisors (x 2 magnification).
It is important to note that the materials we have used for our retouchings are easily reversible, and so can be safely removed in the future if so desired, without causing harm to the painting.

(left): Mixing colour during retouching of Saint Ambrose (right): Retouching Saint Augustine
Re-varnishing:
A final layer of semi-shiny varnish (stock solution [see isolating varnish], 160ml White Spirit and 5g of Cosmolloid wax) was then spray applied to the panels using a Chiron spray gun.
No photos sadly of the process due to health and safety concerns, but here is a picture of the spray gun at rest.

Chiron spray gun at rest
Re-framing:
The final stage was to fit the panels into the new frames, which were designed and created by the furniture conservator Rupert McBain and his team (see previous post). These frames were created to have two distinct profiles, corresponding to whether the sides displayed the depictions of the Passion or the Saints, in line with previous examples researched by Rupert, such as the Geel altarpiece.
The first step was to place the panels (Passion side facing down) into the reverse of the moulded frames. Cut to size Plastazote spaces were then secured to the upper and lower edges of the frame rebates using High Tack Fish Glue. The next stage was to screw the individual reverse face sections to the back of the moulded frame. Andy from Rupert McBain’s workshop then expertly applied, trimmed and carefully stained oak plugs over the sites of the screw holes.

(left): Removing excess glue from the Plastazote spacer (right): Removing excess glue the from Plastazote spacer
The altarpiece is now fully reinstalled and back on display in the gallery, and I think I can unbiasedly say that whatever your artistic leanings it is well worth a visit. In terms of viewing the previously unseen paintings of the Saints, a decision has yet to be announced regarding the times for the closing of the sides of the altarpiece, but as soon as this information is released, I will make sure it is immediately uploaded to the blog.

(left): The Bishop of Durham opening the newly conserved altarpiece (right): The Altarpiece after conservation
Please keep following the Bowes Museum blog for future posts on the work of the conservation department.
By Paul Turner – Icon/HLF Paintings Conservation Intern
![]()
![]()
Related posts
All posts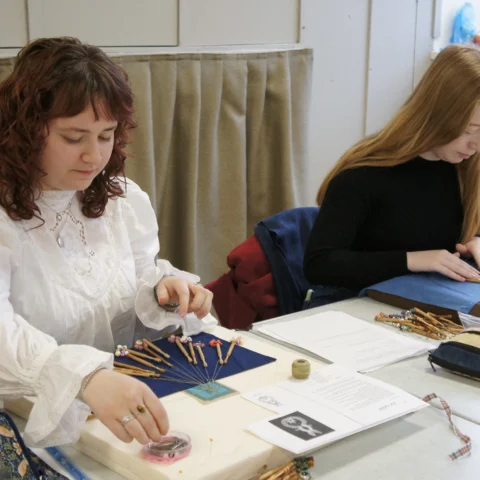
Volunteering with The Blackborne Lace Collection
When I saw the advertisement for a PhD studentship exploring The Blackborne Lace Collection at The Bowes Museum, I was desperate to be involved. At the time, I was finishing my undergraduate course in Conservation of Cultural Heritage, and looking for opportunities to further my experience before doing a master’s degree in Textile Conservation. After
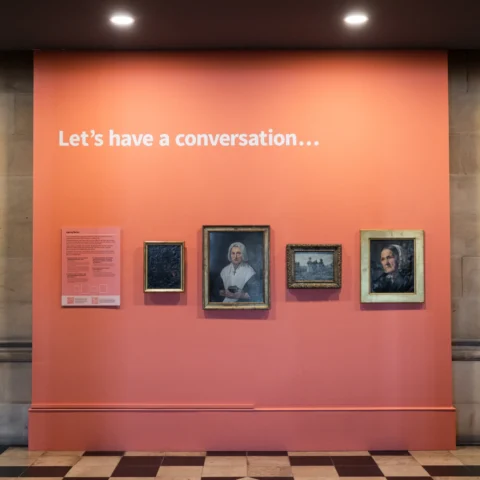
Ageing Better
November’s Conversation Wall, titled ‘Ageing Better’ presents a selection of 18th and 19th century paintings depicting different interpretations of ageing. The display puts the paintings into context, explaining the social and historical factors including class, gender and material status that would have impacted someone’s quality of life in the time that the subjects were painted.
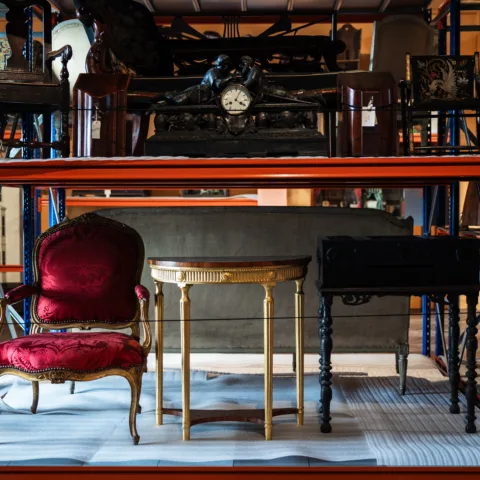
Creating a Space to Explore Collections Care
Over the last two years there has been a spurt of object movement at Museum, spurred on by the implementation of its new Mission and Values and focusing on making the collections more accessible. Some objects in storage are being relocated and some storerooms are being re-purposed. The result is that many objects which haven’t


VW: Rebel Storyteller Visionary Wooden Pin
£4.50
Rebel Storyteller Visionary Cotton Theale Bag
£19.50
Rebel Visionary Storyteller Magnet
£3.50

Rebel Storyteller Visionary A2 Poster
£3.99

Bowes Museum x HIMP Westwood Tote Bag Black
£16.99
SIGN UP TO OUR NEWSLETTER